Showing posts with label Wet n' Wild. Show all posts

Friday, February 3, 2012

14 Days of Pink: Red Hearts on Neutral

I admit, I love this manicure. It reminds me of my mom. Many years ago when I was fairly young, my mom took a folk art painting class. She learned to paint (I always thought she painted so well!) among other things, the "Dolly Parton heart". On a few of her projects, I was put on Heart detail--it was my job to paint the hearts.  Here's how to paint a Dolly Parton heart: paint two dots with a dotting tool (he he, like...er... you know) and then drag some of the paint down for the heart point. Easy peasy!
Red Hearts on a lovely neutral
My husband picked up this pretty China Glaze as a surprise for me last week. The application is a little tricky, but I love the color (China Glaze's Heaven). Simple, but fun for Valentine's Day!
China Glaze Heaven and Wet n Wild Wild Shine in Red Red, dotting tool

Sunday, January 8, 2012

Stamping Sunday: Green

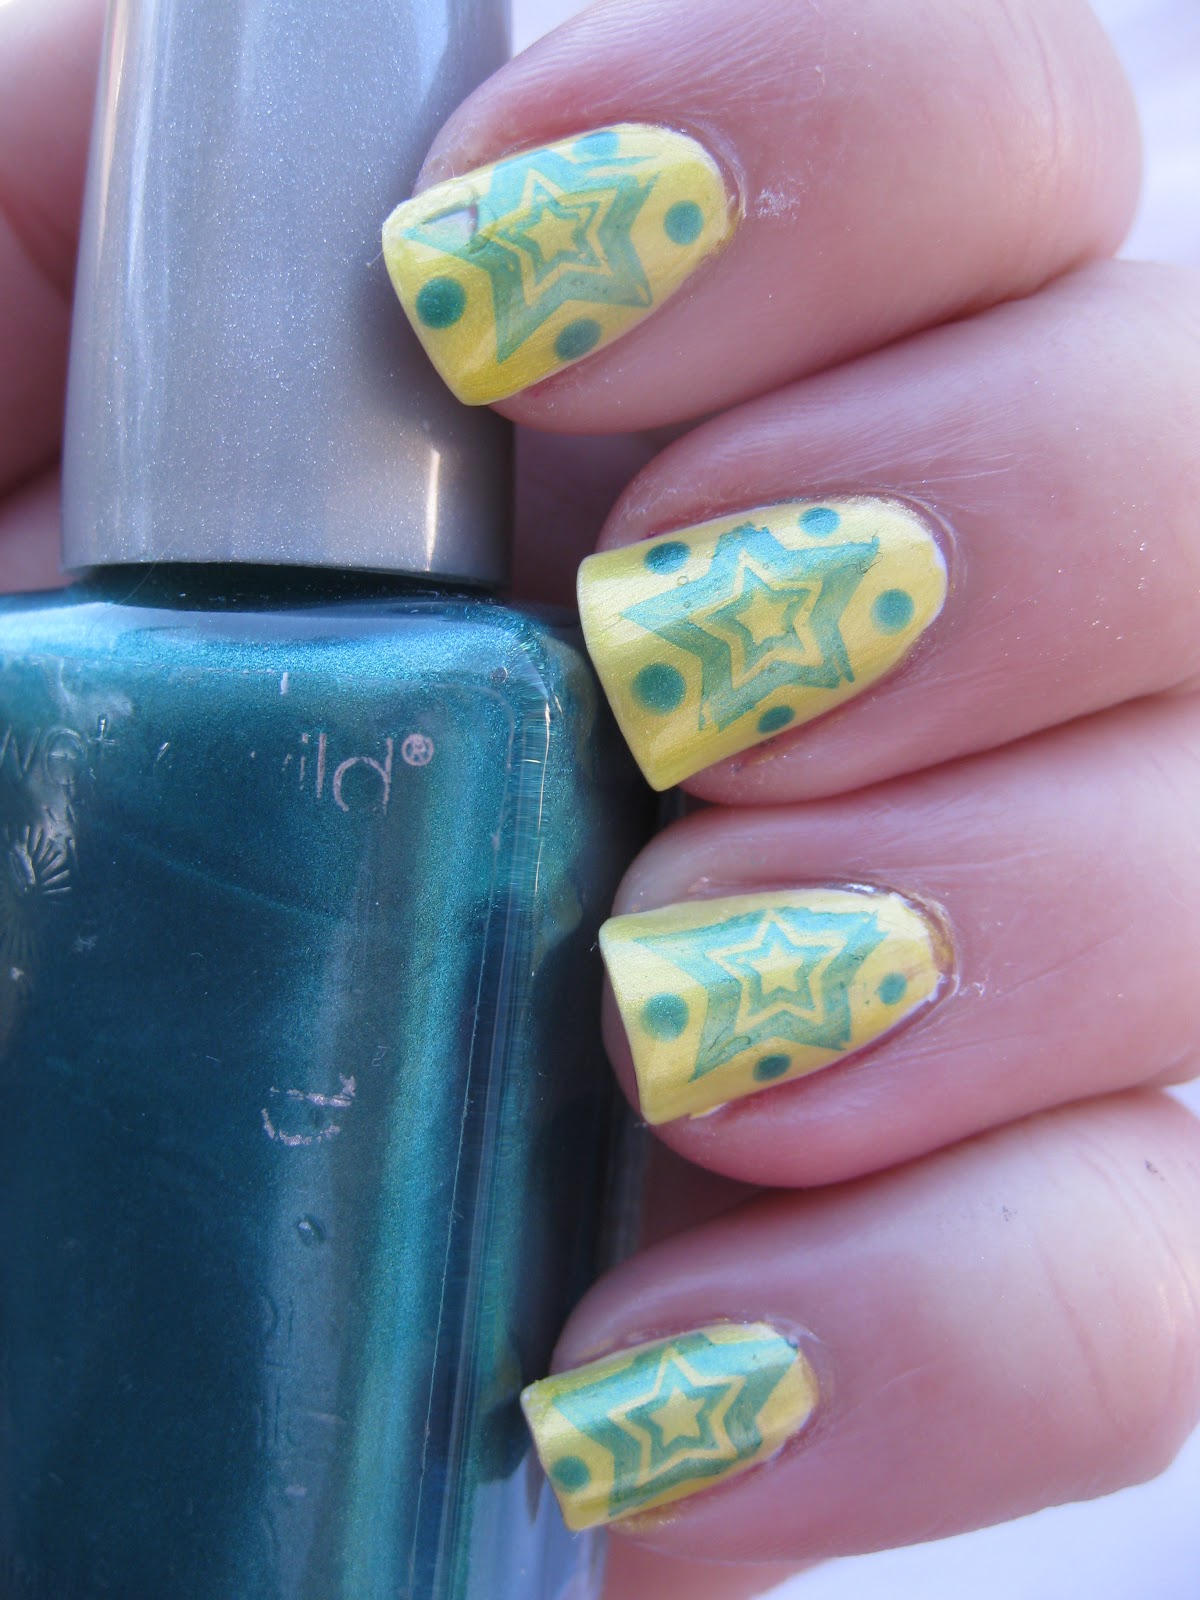
Christmas was good to me this year! My brother bought me these fun Mash stamping plates. I've never done stamping before (the most popular brand seems to be Konad, youtube it if you want to know more). I'm also a part of a super cool new group called Adventures in Stamping on Facebook. Every Sunday we have a challenge called Stamping Sunday.  Today's challenge was to stamp with a green color. TRICKY for a girl like me with about 20 polishes! But, here's the finished product, my very first stamp manicure!
Stamping Sunday: green
I didn't have a TRUE green (other than an Art Deco nail polish, which has a tiny brush). I used Wet N' Wild in Caribbean Frost. It's in the green family--ish. At any rate, I did a base coat of Pure Ice Super Star and then 2 coats of Pure Ice Excuse Me (the banana yellow color). Then it was stamping time! I used Mash plate 16. The Mash plates are my first plates ever. I have small nail beds so I thought I would be okay with their smaller all-over images, but they don't cover my nails so I'm on a quest for larger all over images. I thought the star alone was kind of plain so I used my dotting tools and added a few dots. So far, so good with stamping!
Pure Ice Excuse me, Pure Ice Super Star, Wet n wild Caribbean Frost, Mash plate 16 and dotting tol

Thursday, December 29, 2011

Inspired By: converse Shoes

This manicure was a lot of fun and surprisingly easy with nail art pens. It would have been better if my nails had rounder tips, but it's all good.

Inspired by Converse Shoes

Cute, huh? It took a lot of different nail polish but it was fast and easy. Just take it step by step.
Wet N Wild Everybody Loves Redmond, Sally Hansen Xtreme Wear Crushed, Pure Ice Excuse Me, Sally Hansen Xtreme Wear Blue Me Away, Wet N Wild Wild Shine Eggplant Frost, Pure Ice Super Star, Sally Hansen art pens

Tuesday, December 20, 2011

Zebra stripes: Gradient: purple and silver

Weee! Another crazy zebra stripe gradient! I started off with two coats of Wet N Wild Eggplant Frost. Next, I sponged (using the edge of a cosmetic sponge) a layer of Wet N Wild Fast Dry in Gray's Anatomy, followed by the tips in Wet N Wild Fast Dry Silvivor. I LOVE Silvivor. After the job was done I used my Art Deco thin tipped brush in black and made some fun free hand zebra stripes.
Zebra stripes gradient
See? Pretty easy and WILD looking! Ha! fun fun!
Wet n Wild Fast Dry Silvivor, Gray's Anatomy, Wild Shine in Eggplant Frost, Art Deco in black

Monday, December 19, 2011

Inspired By: Holiday Funky French Freestyle

How's THAT for a name? This is actually an Amanda original! It's fun, different and easy enough for even my left hand.
The Funky French Freestyle
This was a quickie. I started off with 2 coats of Wet n Wild Wild Shine in Red Red. Next, I just eyeballed a funky french with Pure Ice Super Star (white). Normally I would have taped, but I was in a hurry and I knew i would use the glitter to cover up any "whoops". I then added a swoop of Bright Green by Art Deco and then a swipe of Art Deco silver glitter. Quick and fast!
Wild Shine  Red Red, Art Deco in silver glitter and Bright Green and Pure Ice Super Star

Saturday, December 10, 2011

Crackle Manicure: Black and pink

This was my first time using a crackle polish. I just happened to be lucky enough to grab it for free from Savemore. It's a no name crackle from FabulousNails.com and may contain chemicals that will slowly kill me--but I like it! I painted my nails with two coats Wet n' Wild Wild Shine in Lavender Creme (?)...a very bright pink. Then I applied a very thin layer of the black crackle polish. It dried in a matte black in about 2 seconds!
Wet N' Wild Wild Shine Lavender Creme and no name crackle
Overall I've been happy with it! Here's the finished product. And today I was able to get Sally Hansen Instant Cuticle remover to help my nappy, dry cuticles.

Wednesday, December 7, 2011

Sponge Mani: Gradient: purple and turqoise (peacock!)

Right to left: Wet n' Wild Wild Shine in Eggplant Frost and Caribbean Frost. A gnarly cosmetic sponge.
Have you ever seen those super cool gradient manicures and wondered how they did it? Thanks to YouTube.. I now know! The secret is a cosmetic sponge (or any sponge really)! I applied 2 layers of Wet n' Wild Wild Shine Caribbean Frost. I waited for mine to dry.. accidentally. I think it would blend better if you did it all in one step, really. Then, I took my Eggplant Frost (I love this color) and Caribeean Frost and tabbed a little of  both on some waxed paper and mixed them with a qtip. I'm sure a toothpick would have been more ideal. Meh. Then I cut off a corner of the sponge--to avoid a line sponged on--and gentle applied the mixed color to 2/3rds of my nail, leaving some of the Caribeean frost in view. Next, I did the same technique, but just plopped some of the Eggplant Frost to the sponge and sponged the tips. Voila! A beautiful peacock gradient is born!
Sure, it could have been blended better, but from a distance, this is a cool mani.
Thanks for stopping by! What colors for a gradient mani would you use?

Monday, December 5, 2011

Scotch Tape: Funky French Mani: Red and Black

This looks is referred to the Funky French. It's a French manicure...almost! I love doing Funky French manicures to cover up any chipped tips a few days after I give myself a manicure. It's a whole new look plus it stretches your old mani a little bit longer. On to the stars of this manicure:
Left: Pure Ice Black rage, Wet & Wild Wild Shine Red Red, cheap tape
I used Wet & Wild Wild Shine in Red Red as my base coat. I'm not crazy for red--but the application of this one is beautiful! No brush strokes, 2 coats and full coverage. Lovely for .69 on sale at CVS. I added the tips in Pure Ice Black Rage. LOVE this black. Full coverage in one swipe most of the time! In case you are new to Scotch Tape manicures, it's very simple--but there are two rules you must follow: ALWAYS put the piece of tape on the palm of your hand a few times to make it less sticky (or else it will totally rip your base coat of polish to shreds) and number two: only work on one finger at at time. It's very tempting to want to tape off all your fingers at once--don't do it! Paint your base coat and let it dry. Add a top coat and make sure it is GOOD and dry. Do not rush this step. In fact, I've been known to do my base polish at night and the next day add my other layers. It's all good. Next, use the tape that you've "de-stickified" and tape off where you want to add your other color. Paint quickly and use a polish that will coat in one coat. Take the tape off as soon as you're done painting...do not wait for it to dry! Voila--the Funky French!
The Funky French. I have the diagonals going the other way on my right hand.