Showing posts with label glitter. Show all posts

Wednesday, February 8, 2012

14 Days of Pink: Black Dot Funky French on glitter

This MAY be a little over the top for some, but the pink glitter is so pretty underneath!
Weeee! I just did 3 layers of Finger Paints Hue Left A Message? and then, using a dotting tool, I added dots and a french tip with black!
Finger Paints Hue Left A Message? and Pure Ice Black Rage (no pictured, dotting tool)

Saturday, February 4, 2012

14 Days of Pink: Hot pink and glitter

Glitter, glitter, glitter! What's Valentine's Day without glitter? Today I paired a flame hot pink with a lovely pink glitter!
Wee! Arn't they pretty together? I used China Glaze Purple Panic (Neon). It goes on sort of matte because it is so pigmented, but once I put the glitter on and a top coat of Seche Vite it was great!
China Glaze Purple Panic (Neon) and OPI Excuse Moi

Friday, December 16, 2011

Inspired By: Holiday Patchwork

I wasn't thrilled with my first Scotch tape patchwork manicure--but I like this one! It LOOKS complicated, but it's not. There are two tricks to working with tape (I just use a no name brand): 1) Always let your layers dry all the way before taping and 2) always stick the tape on the inside of your hand a few times to get rid of the mega-stickiness.
The Holiday Patchwork Manicure
I did two layers of Wet N' Wild Fast Dry in Everybody Loves Redmond. I love this polish! It goes on so well and not a single brush stroke. Once that was dry I taped off and used the fabulous Super Star white by Pure Ice. Last, I did the bottom of my nails using LA Craze silver glitter. Wet N' Wild Fast Dry can be found at almost any CVS, Dollar General or Walmart for about $2. Pure Ice is $2 at Walmart. LA Craze can be purchased at Family Dollar, Dollar General or even Dollar Tree for $1! Fun!
Wet N Wild Fast Dry in Everybody Loves Redmond, LA Color Craze, Pure Ice Super Star and tape!

Inspired By: Holiday French Glitter

I like the simplicity of this french manicure done with a glitter polish. Simple, but with a punch.

Glitter polish is so tricky. Either it looks well placed or just terrible. This wasn't so bad. I used that same "swamp green" from yesterday's manicure (also known as Confetti's My Favorite Martian). This was about a million coats. I did the base coat and then took my glitter polish and just made sort of a sloppy French manicure style strip on the tip of my nails. I let that dry and then went back very lightly about 3/4 of the way down my nail.  Here's what I used:
LA Color Craze (found at any Dollar store $1)  and Confetti My Favorite Martian (from CVS for $2)

Monday, December 5, 2011

Scotch tape Patchwork Manicure: white/pink/glitter

Have you ever used Scotch tape for a manicure? It's so much fun and easy! There's one trick to keep in mind: always put the tape on the palm of your hand a few times to make it not-so-sticky before placing the tape on your nails. Also, be sure to work one nail at a time and to remove the Scotch tape as soon as you are done applying polish (so, don't wait for it to dry!). Here are the stars of this time-consuming but easy, manicure:
L.A. Colors Nail Lacquer with Hardener in Cotton Candy, Pure Ice Spit Fire and Pure Ice Super Star (and some no name tape)
 First step was to apply a base coat of clear and then 3 layers of L.A. Colors Nail Lacquer with Hardener in Cotton Candy. You can find L.A. Colors Nail Lacquer in just about any Dollar Tree or Dollar General for .99.  They're not great, I'm not going to lie--but they get the job done. Cotton Candy is extremely opaque, more so than I had planed on. Oh well. It would make a good classic French manicure color. Once the pink was dry I got out the tape and went to town! Working one nail at a time, I taped off small patchwork sections of my nails and filled in with Pure Ice Spit Fire. I then applied a clear layer (I used Sally Hansen's Insta-Dri) and waited for that dry very well. Next, I taped off ANOTHER section and filled that in with white. You can see in the photo that a few of the white lines are not so great--the tape wasn't all the way down.  So, in other words, if you're going to attempt this, have some time on your hands! I finished with another layer of Insta-Dri and voila! Not exactly what I was expecting (The white was just too much of a contrast for me), but fun!

Saturday, December 3, 2011

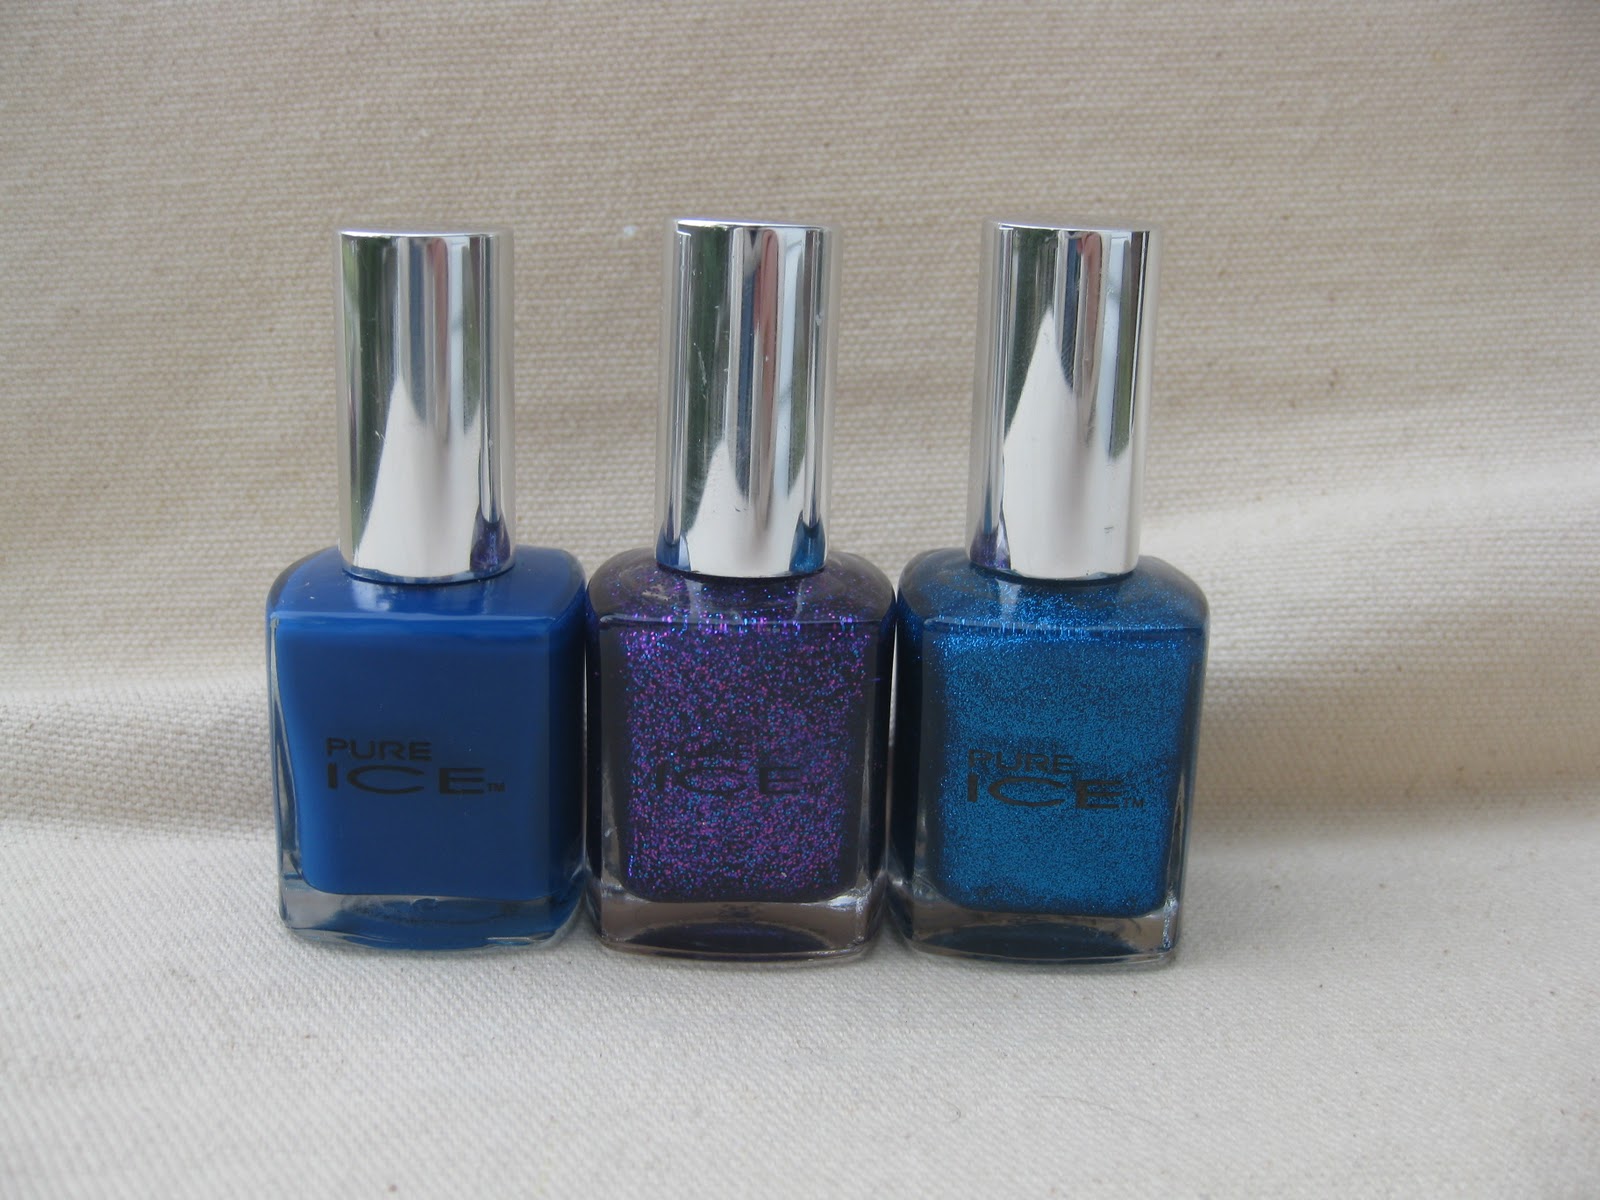
Pure Ice: French Kiss/Cheatin'/Strapless

From left to right: Pure Ice French Kiss, Cheatin and Strapless

Okay, let's let this party start, already! I'm terribly sorry about it taking so long! I LOVE nail polish and I love blogging--but photography is NOT my strong suit! Feh. Any road, I'll be getting better as we go I'm sure. Bear with me. I actually painted my nails about three days ago, so there are three days of wear on my nails at the moment but I love these colors together! Since I am just now rebuilding my nail polish collection, it contains mainly Pure Ice and Wet and Wild Wild Shine (which both are under $2 a bottle at Walmart or CVS). My goal in this blog is to show some fun techniques and simple (emphasis on the simple!) do it yourself nail art that any one can do with just a few basic, cheap nail polishes.

I totally bought cuticle cream today--time to get that mess cleaned up!

On to how I "did" my nails! I did two layers of Pure Ice French Kiss, which is a beautiful creme blue. I had big plans to use my white nail art pen, but then I remembered my matching Pure Ice Strapless. Strapless totally surprised me! I was ready for spotty-application glitter nail polish--nay nay! It was a nice thick glitter that covered very well! I had a few extra minutes and wanted to add another color, so on went one layer of Pure Ice Cheatin'--a lovely deep purple glitter (MUCH more sparse than Strapless) with hints of blue as well.  One layer of Sally Hansen Ista-dry and I was done! For how hard I am on my hands I'm always happy with Pure Ice's staying power. Hate taking off glitter polish? Soak a cotton ball in Acetone (or just nail polish remover), put the cotton ball on your nail and wrap it in strips of aluminum foil. Let it stay for about 5 minutes and it just comes right off!